
Installation of LED Linear Lights System - Surface Mounted
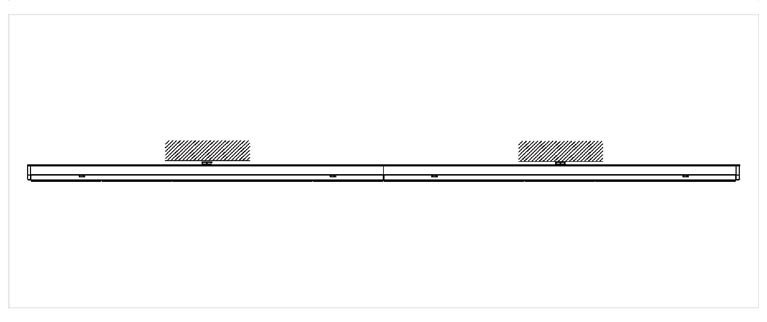
Step 1: Surface mounted
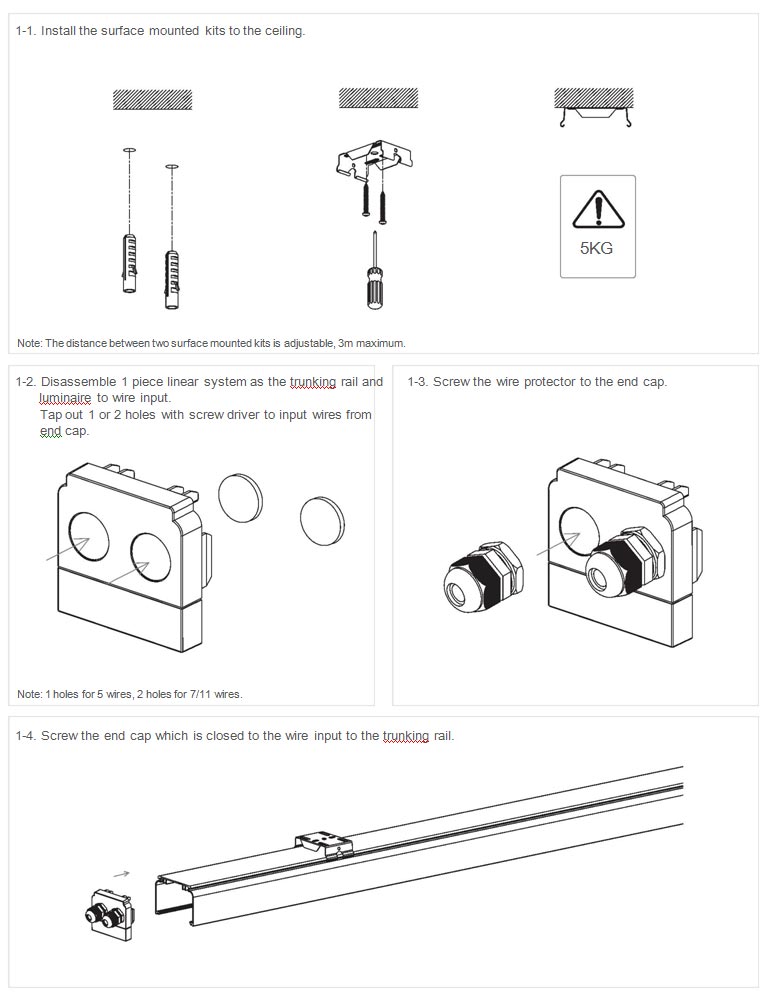
1-1. Install the surface mounted kits to the ceiling.
Note: The distance between two surface mounted kits is adjustable, 3m maximum.
1-2. Disassemble 1 piece linear system as the trunking rail and luminaire to wire input.
Tap out 1 or 2 holes with screw driver to input wires from end cap.
Note: 1 holes for 5 wires, 2 holes for 7/11 wires.
1-3. Screw the wire protector to the end cap.
1-4. Screw the end cap which is closed to the wire input to the trunking rail.
Step 2: Wire Input
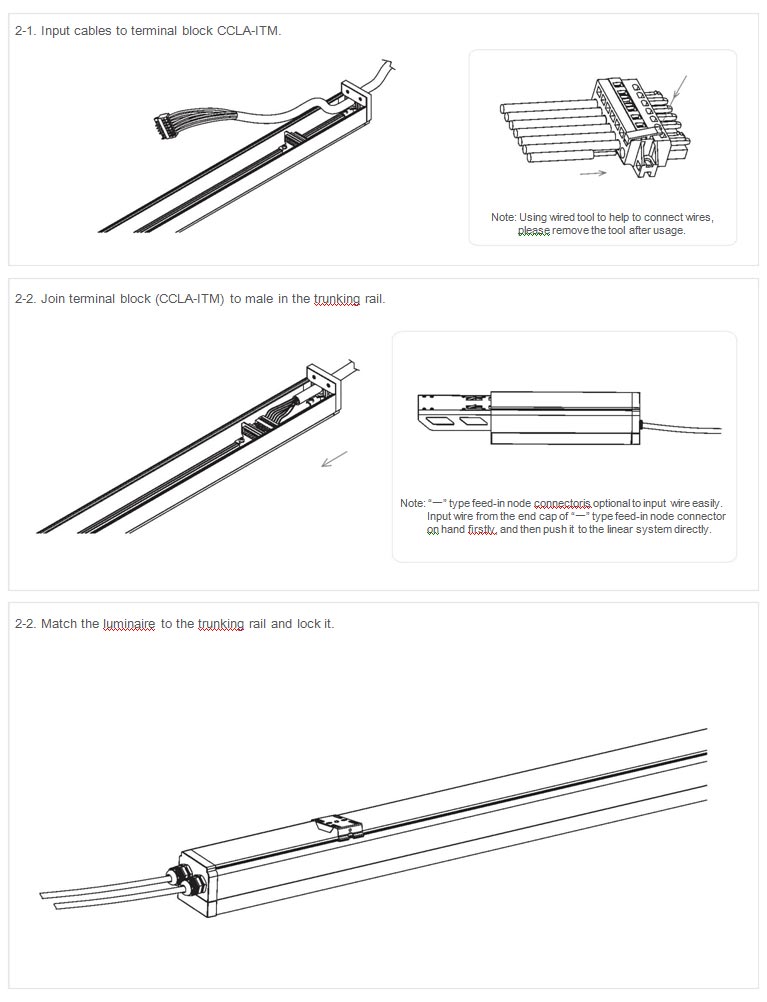
2-1. Input cables to terminal block CCLA-ITM.
Note: Using wired tool to help to connect wires, please remove the tool after usage.
2-2. Join terminal block (CCLA-ITM) to male in the trunking rail.
Note: “一” type feed-in node connectoris optional to input wire easily. Input wire from the end cap of “一” type feed-in node connector on hand firstly, and then push it to the linear system directly.
2-3. Match the luminaire to the trunking rail and lock it.
Step 3: Connection - Integrated Packing
3-1. Push 2 whole sets of linear system directly to connect.
Note: Integrated packing means luminaire and trunking rail are packed in the one carton.
3-2. Adjust the position of linear system according to your need. The distance between two linear system is 3m maximum.
Optional Connection - Separated Packing
Separated packing means luminaire and trunking rail are packed in different carton. Please follow this optional connection when the below situation happen.
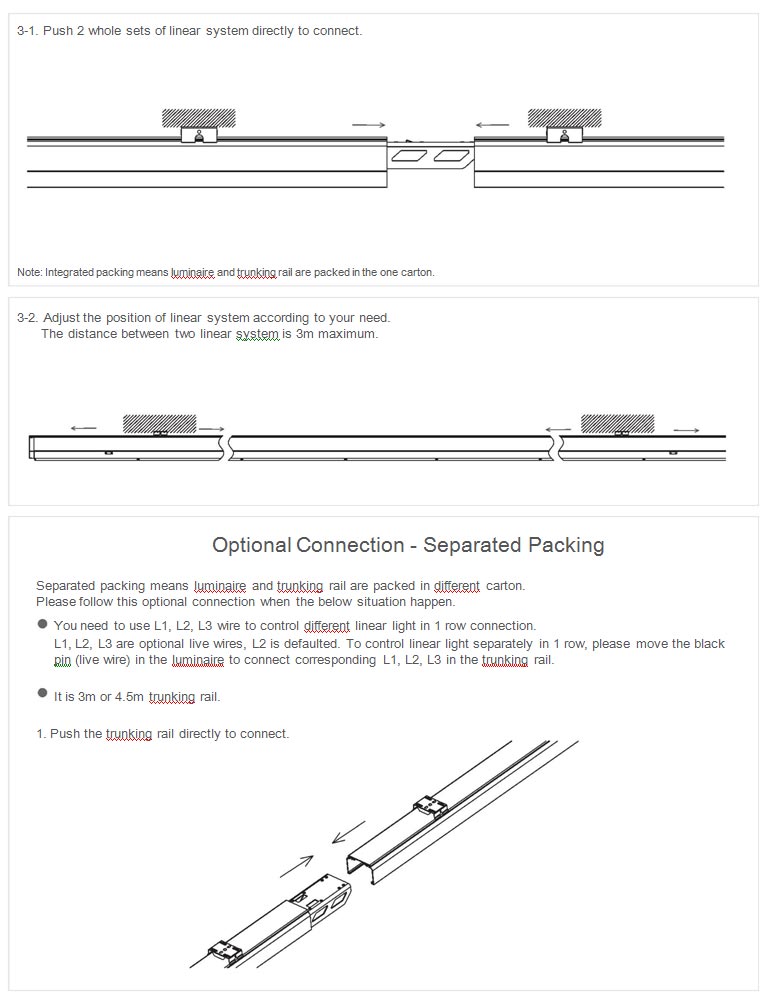
You need to use L1, L2, L3 wire to control different linear light in 1 row connection.
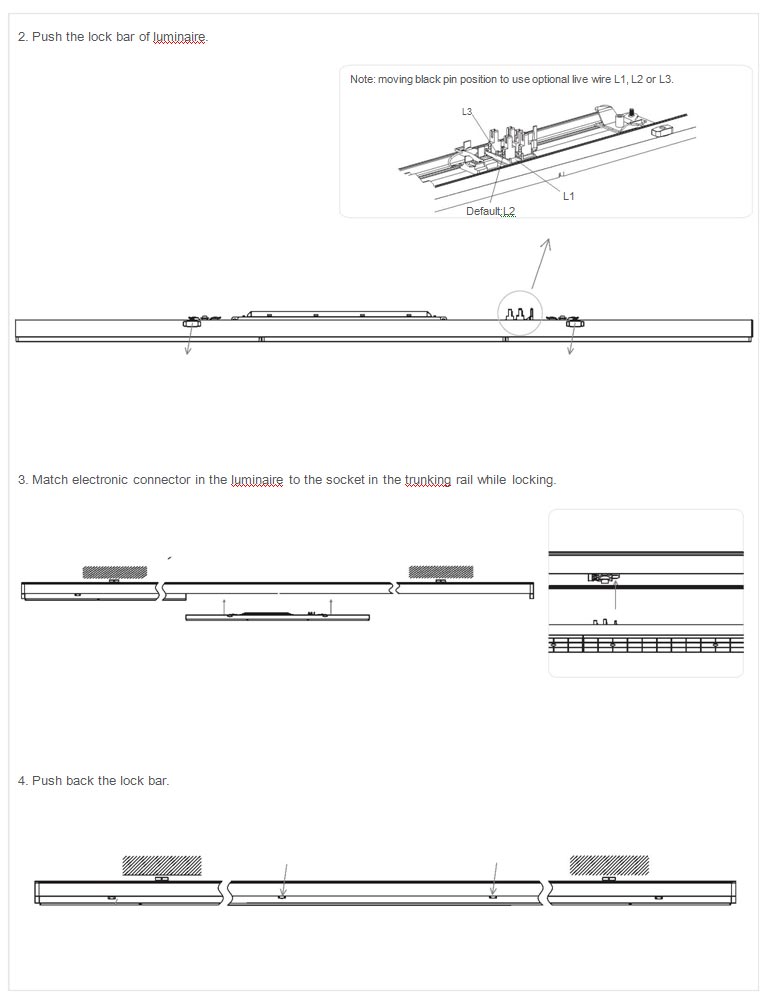
L1, L2, L3 are optional live wires, L2 is defaulted. To control linear light separately in 1 row, please move the black pin (live wire) in the luminaire to connect corresponding L1, L2, L3 in the trunking rail.
It is 3m or 4.5m trunking rail.
- Push the trunking rail directly to connect.
-
Push the lock bar of luminaire.
Note: moving black pin position to use optional live wire L1, L2 or L3. - Match electronic connector in the luminaire to the socket in the trunking rail while locking.
- Push back the lock bar.
Step 4: Closing
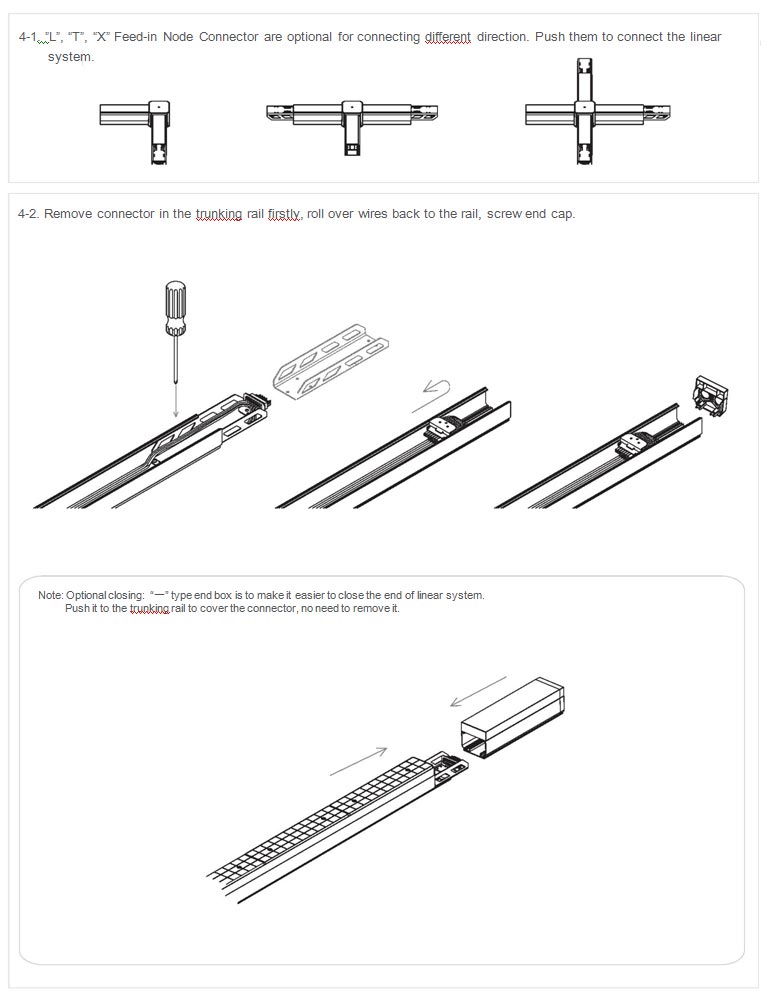
4-1. ”L”, “T”, “X” Feed-in Node Connector are optional for connecting different direction. Push them to connect the linear system.
4-2. Remove connector in the trunking rail firstly, roll over wires back to the rail, screw end cap.
Note: Optional closing: “一” type end box is to make it easier to close the end of linear system. Push it to the trunking rail to cover the connector, no need to remove it.
Installation Guide
- Installation Attention for Linkable LED Trunk Lights
- Installation of LED Linear Track Lights
- Installation of LED Trunk Single Lamps - Surface Mounted
- Installation of LED Linear Single Lamps - Suspension
- Installation of LED Linear Lights System - Surface Mounted
- Installation of LED Linear Lighting System - Suspension
- Structure of Linkable LED Strip Lights
Application of LED Linear Lights
- LED Trunking Light System Application in Supermarket
- Linear LED Lighting System Application in Classroom
- LED Linear Trunking Lights Application in 4S Service Center
- LED Linear Lights Application in Offices
No. 617# Yinxian Avenue
Dongqianhu, Ningbo, Zhejiang, China
Tel: 0086-574-87314010
Email: